Wednesday, April 30, 2014

Hello card

Hello, it's Joan and I've made a flip card to share with you today. I used papers from Moxxie's "Forever Family" collection to create the base of the card, cutting it out with a Sizzix die. Then I added a white scallop circle, a yellow circle cut from the Moxxie paper, a brown doily sticker (Martha Stewart) and a bird sticker. The hello sticker is from Jillibean.

The card flips open when pulled and I wrote my message on the back of the green circle. This was a quick card to make and I really like how it turned out! Check out the Speedy Scrappers store to get this lovely Moxxie paper.

Tuesday, April 29, 2014

Antigua- our honeymoon

Hi all, happy tuesday! :) hope this day finds you enjoying warmer weather! .. Finally! Now i don't want to rush spring but i got the feeling of summer when i laid eyes on this collection! Love it! So i just had to make a page with a pic from our  honeymoon. We stayed at sandals in antigua and it was paradise! Aww makes me want to go back.. Someday i hope! Ok , now i need to snap out of my daydream lol! And tell ya how i made my page . First i used the beach paper then layered a strip of the basket weave paper that i inked the one side to match the other and placed it in the middle.added the border stickers.  Then i took out my two fav punches a jumbo flower and swirl punch to make a big flower and layered it with a plain prima flower and a decorative brad. Next, layered the prima flowers and wood veneer flowers added a punched scalloped circle with a saying sticker i found . Lastly, i made the date and subtitle with the little letters  and word from the sticker sheet and letters from my stash to spell antigua. Have a great day and happy creating! ~jen t. :)


What i used:
Kaisercraft paridiso collection papers
Kaisercraft parisido collection letter and word 
Kaisercraft paridiso border stickers
Prima flowers pattern and solid colors
Saying sticker
Swirl punch
Scalloped circle punch
Jumbo flower punch 
Echo park decorative brads
Stampin up white craft ink
Glue dots
Scotch adhesive
Prima wood veneer flowers 
White doodlebug design letters 

To check out more awesome goodies and inspiration "like " Speedy Scrappers at www.facebook.com/speedyscrappers and visit the website at www.speedyscrappers.com  or get your supplies in the speedy scrappers store.


Monday, April 28, 2014

Endless Summer

DT member Karen created this wonderful layout using Moxxie ' s Child Play line.


Stop by Speedy Scrappers' to get this wonderful line.  Don't forget to visit our Facebook page. www.facebook.com\speedyscrappers.

Friday, April 25, 2014

Jump by Ange

Hello Speedy Scrappers!
I'm ready for some summer fun. How about you? 
My fellow dt member Jen T has shown you some really awesome projects with Moxxie's Child's Play line. Today I wanted to show you a layout I made using this fun line.


I love this cute photo I got of my son jumping through the sprinkler last year, so I had to create a fitting page for it.


I used border stickers along the top and then created a spot for my title with scrap pps and staples. I love using what's available from the line as titles, because it takes all the work out of it.


I used another border sticker along the bottom and layered some torn pieces of the green paper to slip my photo under. Then I added another "fun" die-cut and this sweet sticker. It totally fits the moment!


The backs of these die-cuts have different patterns on them that coordinate with the line. So you actually have 2 choices. If the front doesn't go with what you're creating, turn it over for another option!


This bright frame was perfect for my photo. Then I finished up with this awesome blue flourish sticker that totally reminded me of water. So I added some glam rocks and clear glossy accents for the "spray".

Thanks for stopping by the blog today! You can find this awesome line in the store and more sweet examples on the facebook page.
:)Ange

Supplies:
Moxxie - pps, stickers, die-cuts
Imaginisce - glam rocks/ I-rock tool
Ranger - glossy accents
Sei - ink
stampin up - marker
adhesive - tombow, ek success
stash - staples

Thursday, April 24, 2014

Meet of new Design Team member Kathy

We are proud to introduce a new local Design Team member to the Speedy Scrappers' team.
Kathy Warma!!
Kathy has been married 45 years with 3 wonderful children and 4 fabulous grandchildren.  Her guilty pleasures besides my grandchildren are decorative painting and paper crafting.  She has been painting for more than 35 years and paper crafting for the last 15.  I believe that we should do something creative everyday to feed our spirit.

For Kathy's first project she has made a small shadow box.  She used Moxxie's Child's Play line and Prima doll stamp. She embellished it with a few pearls, flower and twine from her stash.


For more great ideas, check out Speedy Scrappers' Facebook Page or Speedy Scrappers' web site.

Wednesday, April 23, 2014

New Look for an Old Bear

From this...

To this...

Hi, everyone, it's Joan with a new project to share. Warmer weather means the start of garage sales!! I like to find items and give them a new look.

I've had this wooden bear since last year and decided to give her a makeover with pretty paper by Moxxie. This paper is from the Forever Family collection. The first photo (below) shows her after I pulled off the arms and legs. The body, arm and leg were traced onto the patterned papers with a pencil. Make sure you put the body part on the back of the paper, facing the opposite way, when tracing.

I then glued the pieces onto the bear shape and re-assembled it. The flowers were cut with the Tim Holtz Tattered Florals die by Sizzix. I inked the edges of the flowers, curved them up and pop dotted them together, adding a rhinestone to the center. The bear is holding a Prima "Candy Gems" stem, with a flower on it.

Check out Speedy Scrappers store to order this lovely paper!

Tuesday, April 22, 2014

Let's get-away!!

Hi  all Jen T. here, happy Tuesday!!!! Something you may or may not know about me is that I love making 6 x 6 cards. I make them alot. Why are they my favorite you ask. Because they are a no-brainer , you take a 12 x 12 sheet of  thick paper and cut it in half then fold. .. Wahlaa two card bases.  Today, I am sharing with you one of the two cards I made so far using the beautiful kaisercraft paridoso collection. For this card I just loved the wooden distressed look on the patterned paper, so I used that to make my base then layered on a big sticker of the parrots and the letters and word from the collection,then fussy cut out a flower from another sheet of paper and pop-dotted it to give dimension . Then I inked the edged with brown ink and added a strip of border to the bottom as well as queen & co. goosebumps in the flower centers. Happy creating! Jen T.


What I used:
Kaisercraft paridiso paper
Kaisercraft paridiso stickers
Brown CTMH ink
Pop-dot
Queen and Co orange goosebumps 
Scotch ATG adhesive


To check out more awesome goodies and inspiration "like " Speedy Scrappers at www.facebook.com/speedyscrappers and visit the website at www.speedyscrappers.com  


Friday, April 18, 2014

Follow your heart by Ange

Follow your heart!


Today I have this beautiful line from Kaisercraft called The Looking Glass. The papers are gorgeous and have such a fun shabby feel to them. I decided to go with this photo of my daughter after her last dance performance of the season.
 I started with a plain kraft background splattered some mist on it and started layering all of these gorgeous papers. Using the border punch on the edge was perfect because it's such a pretty, intricate pattern.
This butterfly strip at the top is the barcode off one of the papers. The butterflies were perfect for this page and I put the strip to good use. I also used gold liquid pearls for the butterfly "trails".


I was having a hard time finding alphas that I liked to go on this layout. These were originally a bright yellow. I sanded most of the yellow off, inked in brown, wiped, inked in black and wiped again to get this look. It was messy but fun. I used one of the banner stickers to focus the eye on my title.


Last I decided to add this wood veneer, but I wasn't sure what to do with it. I didn't want just plain wood but I was afraid inking or coloring with marker would bleed out and make it so you couldn't see the fun heart design. So I tried the liquid pearls here and I love the way it looks.

You can get this gorgeous line in the store. Come to the facebook page and show us your projects!
Thanks, Ange

Thursday, April 17, 2014

Cute as a Button with Crate Paper

Cute as a Button with Crate Paper
Baby Girl Overalls Shaped Card by Allie Gower


Directions:

  1. Die cut all pieces. Ink edges with Radiant Neon "Electric Pink" ink. (Note: I added faux stitching to the straps and pocket using the Offset feature in Studio Designer Software.)
  2. Assemble card.
  3. Gather fiber and twine and tie cinch with a button. Trim ends to desired lengths.
  4. Adhere dimensional foam adhesive to backs of stickers.
  5. Add flowers. (Note: I inked the small white flower with Radiant Neon "Electric Pink" ink.)
  6. Add buttons to straps.
Supplies Used:

Crate Paper - Little Bo Peep - Hazel
Crate Paper - Little Bo Peep Stickers
Pink Cardstock
Imagine Crafts/Tsukineko Radiant Neon "Electric Pink" Ink
Adhesive (Art Glitter Dries Clear Designer Glue, AdTech Hot Glue)
Flowers (Wild Orchid Crafts)
Buttons (Buttons Galore)
Digital Cutting File: Baby Girl Overalls (Studio Illustrado)

(Tools - Scissors, Trimmer, AdTech Hot Glue Gun, Sponge Dauber)


Wednesday, April 16, 2014

Moo Card with "Party Day"

Hi, it's Joan and today I'd like to share a birthday card I made using Crate Paper's "Party Day" collection.
First, I made three Moo cards. What is a Moo card? It's a small card, 1 1/8" by 2 3/4" in size.
I made my Moos by cutting white cardstock and yellow CP paper to size and then glueing the paper to the cardstock. The edges were inked with Burnt Sienna chalk ink. I then added elements from the Party Day embellishment sheet to each Moo with pop dots. The word "Smile" is from KaiserCraft's "Tea Break" sticker sheet.
The Moos were spaced across the card. I added twine from my stash and pop dotted the Happy Birthday sticker on top.
The Moos were fun to make - Crate Paper's birthday embellishments were the perfect additions!
Check out Speedy Scrappers on Facebook for lots of great ideas!

Tuesday, April 15, 2014

Dream big card


Hi all, happy tuesday!!! Jen t. Here.  i am stopping by to share with you another 4 x 6 card i made using the moxxie childs play collection. Let me just say that i had a ton of fun with this collection! So for this card, i used the red paper from the collection and embossed it with a star embossing folder i had. i lightly inked the edged with white ink. Then, i picked out a few of the shaped die-cuts that are double-sided btw and used the pattern side of each .i then put the sticker frame from the sticker sheet and then pop-dotted the joy diecut in the center but i didnt want to use the word joy so, i added the tree sticker over top. Then, on the oval diecut i added a dream big rub- on that i found in my stash and finished it off with my diy enamal dots ,twine and taped it to a kraft card base. Happy creating. And don't forget to always dream big! :) jen t. 


What i used: 

Moxxie childs play die-cuts,stickers,and red paper
Foam pop-dots
Diy enamel dots
Scotch atg gun 
Star embossing folder
Stampin -up white craft ink 


To check out more awesome goodies and inspiration "like " Speedy Scrappers at www.facebook.com/speedyscrappers and visit the website at www.speedyscrappers.com  


Friday, April 11, 2014

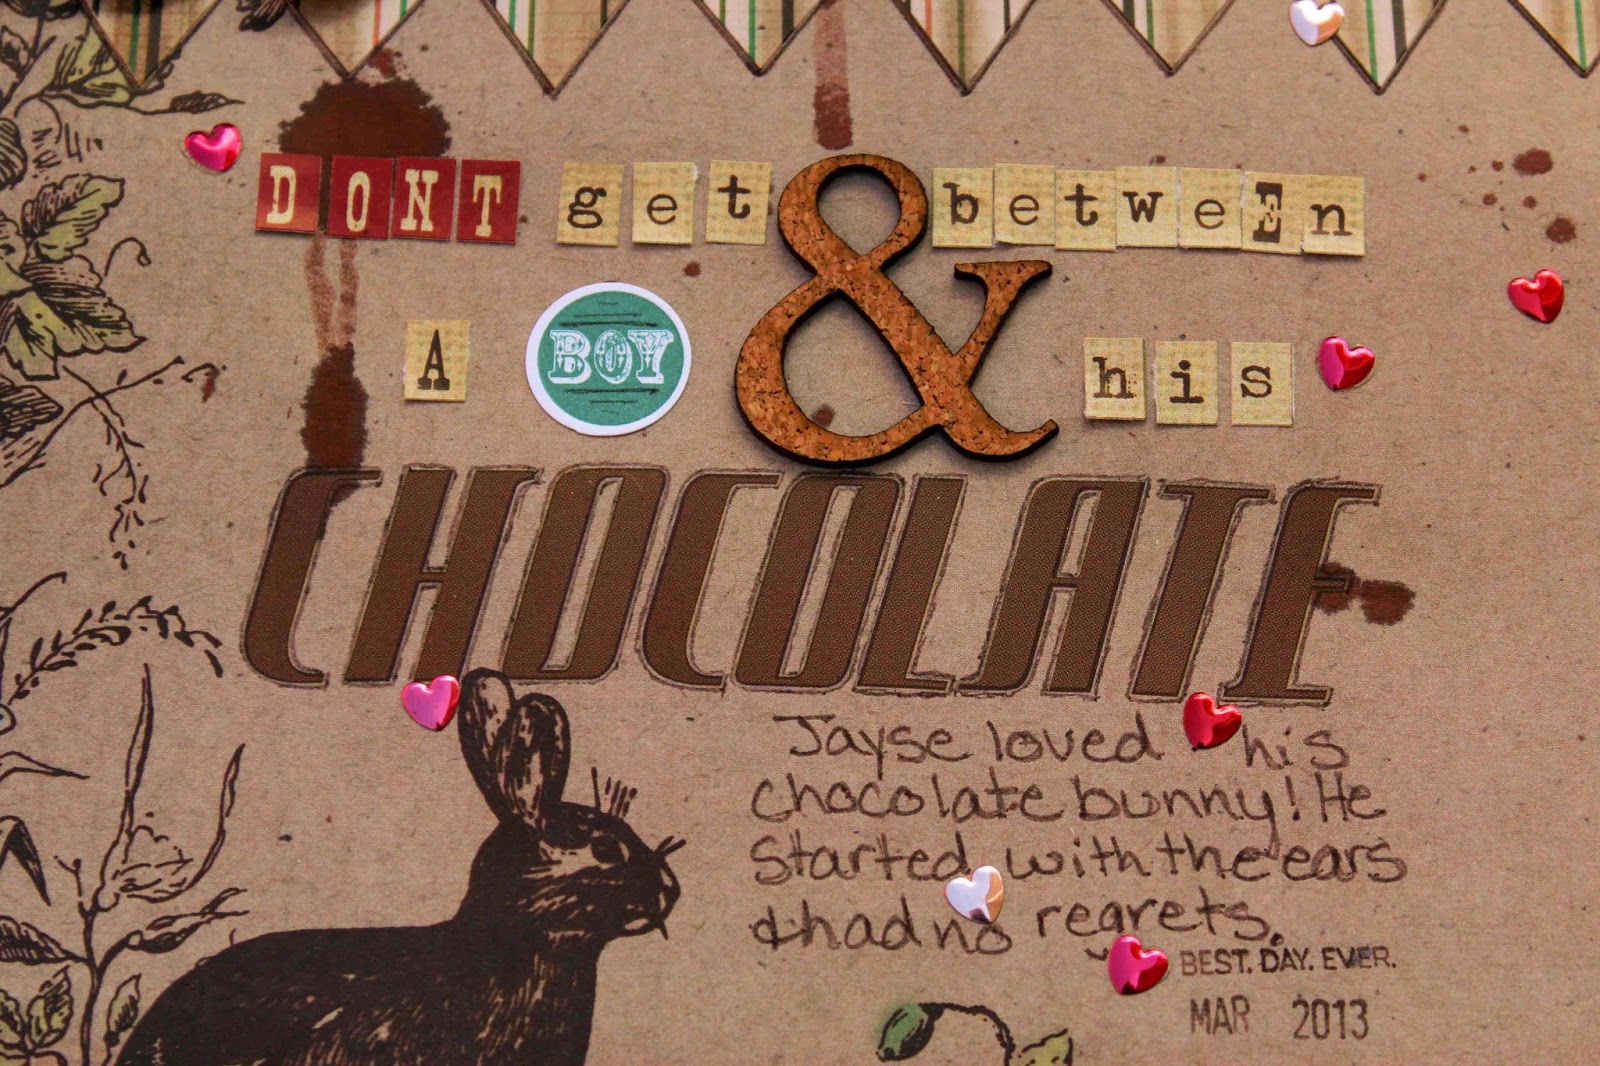
Chocolate by Ange Weisbeck

 Hello Speedy Scrappers!
It's Friday, the weekend is here! What's on your scrappy list for this weekend?
I'm working on pictures from last Easter. Which made me want to pull out this fun Spring Has Sprung line from Moxxie. I love it because it makes me think of chocolate. :)


 This is the same little sweetie that you saw last week sucking on the chocolate syrup bottle. I'm telling you, he has a major thing for chocolate. Which is a little bit funny because my older son doesn't really like it.


This line doesn't exactly scream boy, but this just shows you that you can do whatever makes you happy. I "dirtied" my background with brown mist splatter and inked all my paper edges with Vintage Photo distress ink. These chevrons were a border sticker that I cut apart and then adhered with foam dots to pop them off the page.


One of my favorite things to do to my photos is sand the edges a bit. Gives it a really cool look and here I added ink around the edges too. I also popped my photos off the page.


Here I used different alphas and the large & sign to have a bold title. (great way to use up alphas too!) Chocolate is Moxxie's brown rub-on alpha, I outlined them with a brown marker to help them stand out more.

You can find this awesome line in store!
Come share your Easter projects with us on the facebook page!!
:)Ange

Thursday, April 10, 2014

Easter Wreath

Easter Wreath, a Crate Paper Project by Allie Gower


Directions:

  1. Die cut all pieces.
  2. Leaves - crinkle and curl leaves. Coat with Gooesebumps Shimmer Texture and let dry. Sponge on Cactus Green StazOn ink. Adhere to wreath base.
  3. Flowers - slightly curl leaves and ink with Radiant Neon Electric Pink ink. Fold up centers and attach. Adhere flowers to wreath base.
  4. Eggs - curl pieces and assemble eggs. Adhere to wreath base.


Supplies:

Crate Paper - selections from the Little Bo Peep Line
Green, Yellow and White Cardstock
Imagine Crafts/Tsukineko - "Cactus Green" Stazon, "Electric Pink" Radiant Neon ink, "Shimmer Texture" Goosebumps Dauber
Adhesive (Adtech Hot Glue)
Digital Cutting File: 3d Paper Egg Wreath (Jamie Lane Designs)

(Tools - Scissors, Trimmer, Scoring Tool, Stylus, Cameo, Hot Glue)